Sending WooCommerce order confirmation emails defines your customer’s post-purchase experience – the most important moment after the purchase itself.
WooCommerce transactional emails go a long way in renewing your brand’s interest and encouraging repeat purchases.
Though WooCommerce has an option to set up order confirmation emails, it falls short in many areas.
In this blog, we will see how to send WooCommerce order confirmation emails and how to edit WooCommerce order confirmation email notifications using its default option and a plugin.
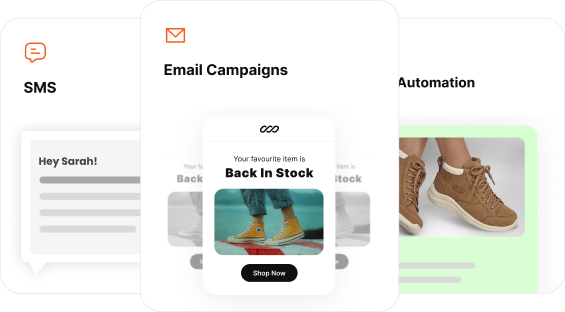
Send automated order follow-up emails using Retainful’s easy-to-setup email automation.
Why Send Order Emails After Purchase in WooCommerce?
WooCommerce order notification emails are more than just a formality. They are crucial communication in the customer lifecycle, especially for WooCommerce stores.
Providing a positive post-purchase experience
The moment after the purchase is as important as the moment of the actual purchase in ecommerce email marketing.
So, sending WooCommerce order emails reinforces the purchase decision and provides an opportunity to show gratitude. A positive post-purchase experience can lead to repeat purchases and customer loyalty.
Opportunity for cross-selling and upselling
WooCommerce order notifications can also serve as a subtle marketing tool.
So, the best email marketing strategy is to include related product recommendations or special offers and encourage additional purchases, turning a simple confirmation email into an opportunity for repeat sales.
Providing essential information
WooCommerce order follow-up emails contain crucial details such as order number, summary of purchased items, billing and shipping information, and the expected delivery date.
This information is not only helpful for customers to keep track of their purchases but also reduces the likelihood of confusion or disputes later on.
Building credibility
When a customer makes a purchase, they expect immediate acknowledgment.
A WooCommerce order email reassures that the purchase is confirmed and the transaction is successful.
Essential Elements of WooCommerce Order Email Templates
An effective order confirmation email template should include the following essential elements:
- Personalized Greeting: Address the customer by name to create a personal connection.
- Order Summary: Clearly list the purchased items, quantities, and prices.
- Order Number: Include a unique order number for easy reference.
- Estimated Delivery Date: Provide shipping and delivery details.
- Customer Support Information: Offer easy access to customer service or FAQs.
- Call to Action: To order tracking page for more order tracking details.
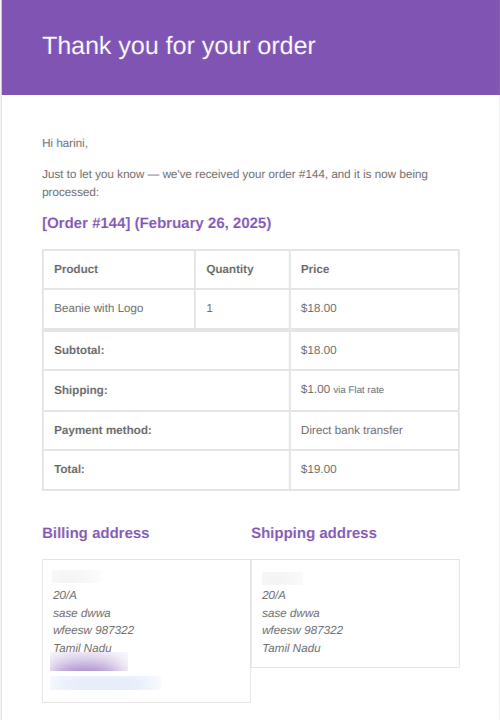
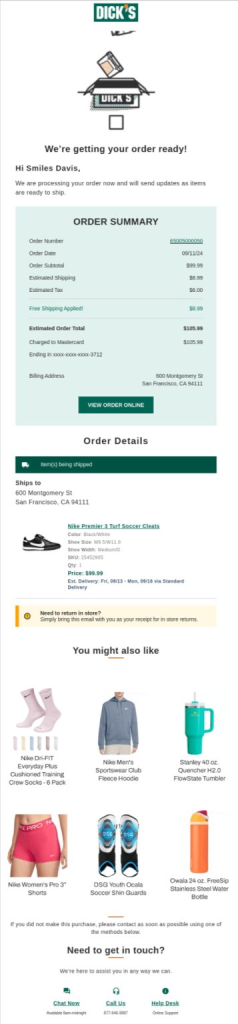
Here is a good example of an order confirmation email template for WooCommerce:
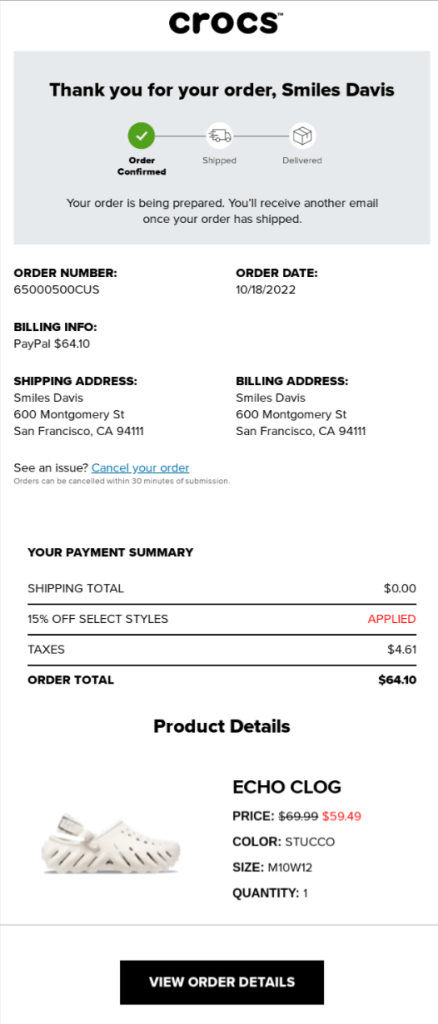
Related Reading: Explore order confirmation email examples and templates:
9 Best Order Confirmation Email Templates & Examples for 2025
10 Order Follow-up Email Templates
Default WooCommerce Order Email Templates
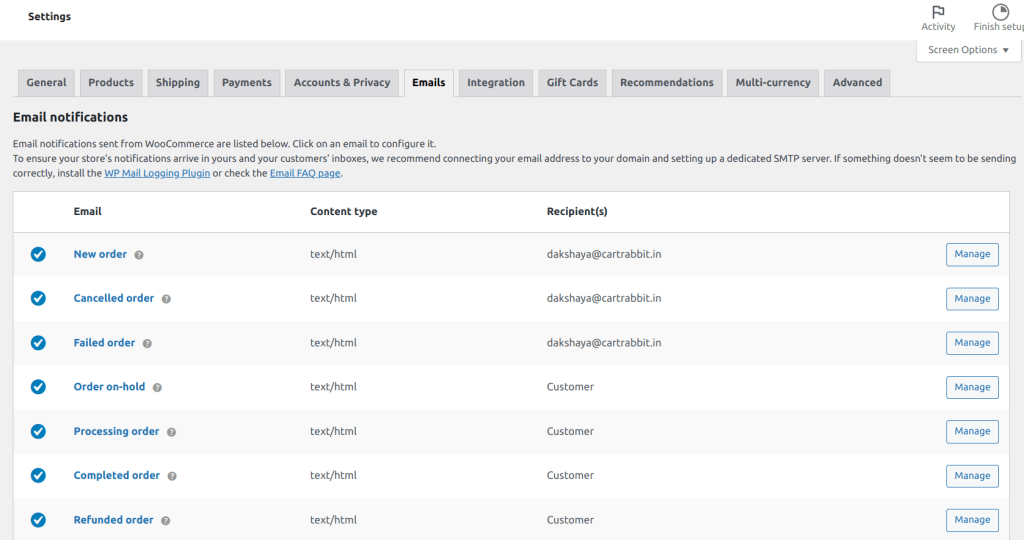
WooCommerce default option comes with a number of order notification email templates that are triggered on actions like order cancellation, order refund, order processing, and more.
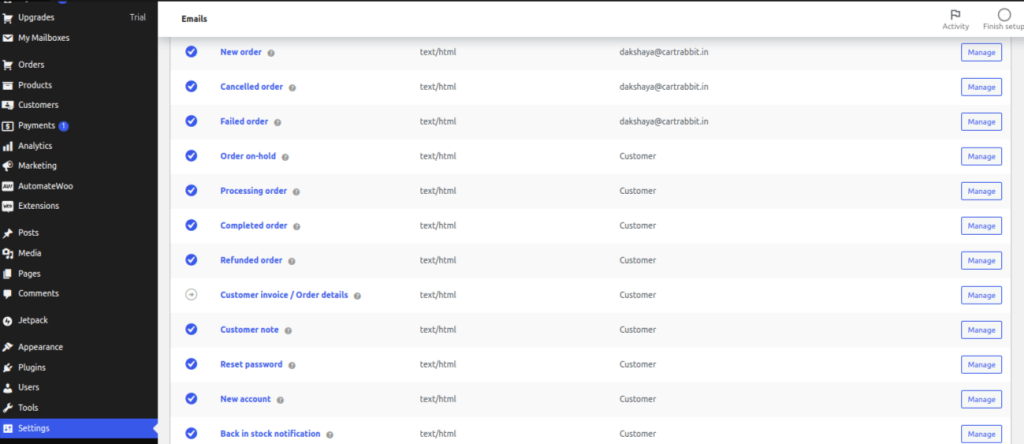
Here are the default order email templates available in WooCommerce:
- New Order – Notifies the store admin that a new order has been placed on the website.
- Cancelled Order – Notifies the store admin of an order that has been canceled.
- Failed Order – Notifies the store admin of a failed order.
- Order On-Hold – Sent to the customer when the order status is changed to “On-Hold”.
- Order Processing – Sent to the customer when the order status is changed to “Order Processing”.
- Order Completed – Sent to the customer when the order status is changed to “Order Complete”.
- Order Refunded – Sent to the customer when the payment of the order is refunded.
- Customer Invoice – Sent to the customer and contains order information and payment links.
- Customer Note – Sent to a customer when a store owner adds a note to the order.
- Password Reset – Sent to a customer when they request a new password on the store.
- New Account – Sent to a customer when they create a new account on the store.
- Back-in-stock notification – Sent to a customer when a product they searched for is back in stock.
Among these order notifications, we have to configure ‘Order Processing’ to send WooCommerce order confirmation emails.
You can see that every email in WooCommerce is sent when an action triggers it. Therefore, you will need to make sure you enable the emails in the list.
How to Send WooCommerce Order Confirmation Emails?
You can send order confirmation emails in WooCommerce using its default settings. These emails are automatically sent after a customer successfully places an order when you enable it.
The steps to send WooCommerce order confirmation emails are:
Step 1: Login to WordPress dashboard and access WooCommerce email settings
Step 2: Enable WooCommerce transactional emails
Step 3: Customize WooCommerce order confirmation email template
1. Using Global settings
2. Using Email template settings
3. Using HTML code
Step 4: Send test email
Let’s see these steps in detail.
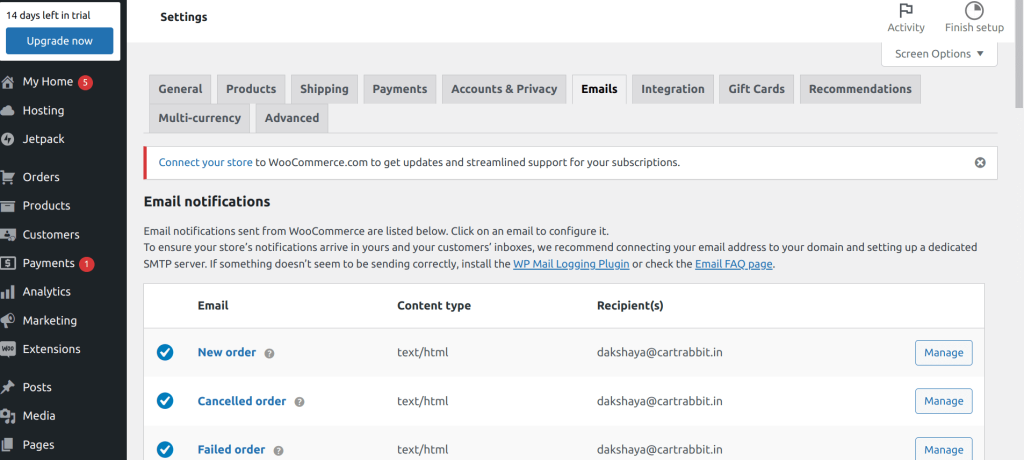
Step 1: Access WooCommerce email settings
To send WooCommerce order confirmation emails, login to WordPress dashboard and go to WooCommerce > Settings > Emails.
Step 2: Enable WooCommerce transactional emails
To configure WooCommerce order confirmation email, go to ‘Processing Order’ and click ‘Manage’.
In the Enable/Disable block, select ‘Enable this email notification’ option to send the order confirmation notifications automatically.
Step 3: Customize WooCommerce order confirmation email template
The three ways to customize the order confirmation email template in WooCommerce are:
- Global settings
- Email template settings
- Custom HTML code
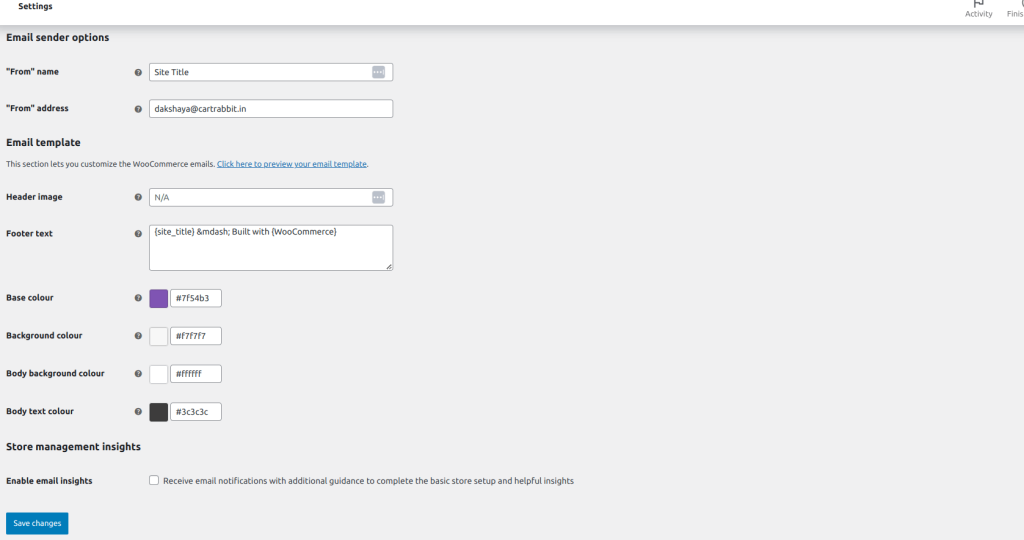
1. Customization using Global Settings
Under the transactional emails list in the Emails section, there are options to edit WooCommerce order confirmation email notification template elements like:
- Header image
- Footer text
- Base color
- Background color
- Body text color
Also, changes done in the Global Settings will be applied across all WooCoommerce transactional email content, not only the order confirmation email.
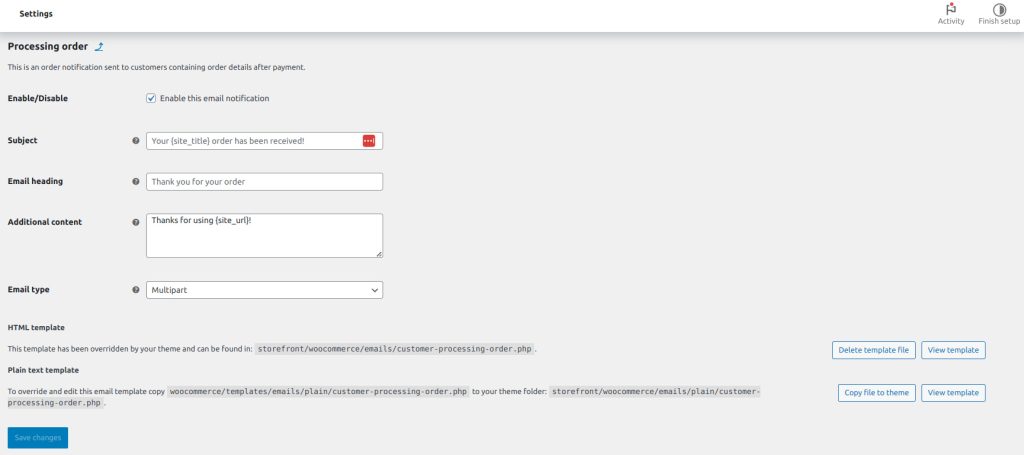
2. Customization using Email template settings
Click ‘Manage’ beside the Processing Order to customize the order confirmation email content in WooCommerce.
Here, you can customize below elements of the WooCommerce order email:
- Subject line
- Email heading
- Email body content
- Email type
In the Email Type section, WooCommerce allows you to choose email types, including plain text, HTML, or multipart.
3. Customizing WooCommerce order confirmation email template using HTML Code
If you want to fully customize WooCommerce order confirmation email notification and include dynamic content, you should use the HTML option.
So, to fully customize the HTML code, click on the “View template” button to see the template file WooCommerce uses for this email.
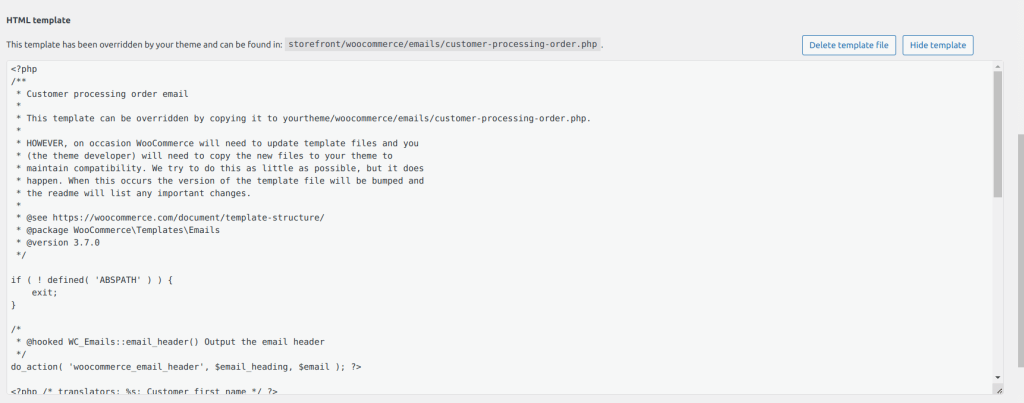
Also, you can edit these files using any HTML editor or the built-in WordPress theme editor by navigating to Appearance > Theme Editor.
Here is a sample HTML code to include a coupon code in your WooCommerce order confirmation email template.
add_filter('woocommerce_email_order_meta_fields', 'add_coupon_code_to_order_email', 10, 3);
function add_coupon_code_to_order_email($fields, $sent_to_admin, $order) {
    if (!$sent_to_admin) {
        $coupon_code = 'SAVE10'; // Replace with your coupon code
        $fields['coupon_code'] = array(
            'label' => __('Coupon Code for Your Next Order', 'woocommerce'),
            'value' => $coupon_code,
        );
    }
    return $fields;
}
Step 4: Send a test email
You can send the test email of a fully customized WooCommerce order confirmation template to confirm all the elements are in the right place.
Now here is a template of processing order WooCommerce email template.
Limitations of Default WooCommerce Order Confirmation Email Template Customization
The default WooCommerce order email customization settings fall short in areas like:
- There is no option to preview each email’s content.
- Testing emails is important to ensure emails’ responsiveness.
- Very minimal option to send on-brand email templates. WooCommerce’s global settings allow you to customize some elements of your WooCommerce emails, like – the sender name, email address, and subject line.
Also, here are other cons of using WooCommerce’s default email settings:
- Inflexible email automation: Option to send only one email, not a series of emails at well-timed intervals.
- Limited personalization: You can only include customer names and order details, not upsell and product recommendations.
- Lack of segmentation: WooCommerce doesn’t allow you to segment your customers based on order history, location, or behavior.
This is why a WooCommerce order confirmation email plugin is a must-have if you want to send automated and personalized order confirmation emails in WooCommerce.
Why use a WooCommerce order confirmation email plugin?
A WooCommerce order confirmation email plugin allows you to:
- Edit WooCommerce email content to match branding.
- Create custom WooCommerce order emails easily with pre-designed templates and a drag-and-drop email editor.
- Automatically trigger WooCommerce order notification emails.
Customize order follow-up emails easily with Retainful’s ready-made templates and a drag-and-drop email editor.
How to send automated WooCommerce order confirmation emails with a plugin?
You can send custom automated WooCommerce order confirmation emails that are on-brand using a plugin like Retainful.
Retainful is an all-in-one WooCommerce email marketing plugin that features easy-to-setup automation, a ready-made template library, and a drag-and-drop email editor for sending custom order confirmation emails in WooCommerce with ease.
The steps to send automated WooCommerce order confirmation emails are:
Step 1: Install Retainful.
Step 2: Choose the email automation.
Step 3: Setup triggers and wait time.
Step 4: Edit WooCommerce order email template.
Step 5: Send test email.
Let’s dive into these steps in detail.
Step 1: Install Retainful
To install Retainful, go to your WordPress dashboard -> Plugins -> Add new. Search for the ‘Retainful’ plugin. Click “Install Now” to install and activate it.
After installation, connect your WooCommerce store with Retainful to create custom email templates in WooCommerce.
So, to connect your store, you have to get the API Keys from the Retainful Dashboard. Go to Settings -> General. Copy your App ID and secret key.

Step 2: Choose the email automation workflow
Retainful allows you to automate WooCommerce transactional emails like order confirmation emails, product review request emails, thank-you emails, and more.
To see the options, go to Retainful Dashboard -> Automation.
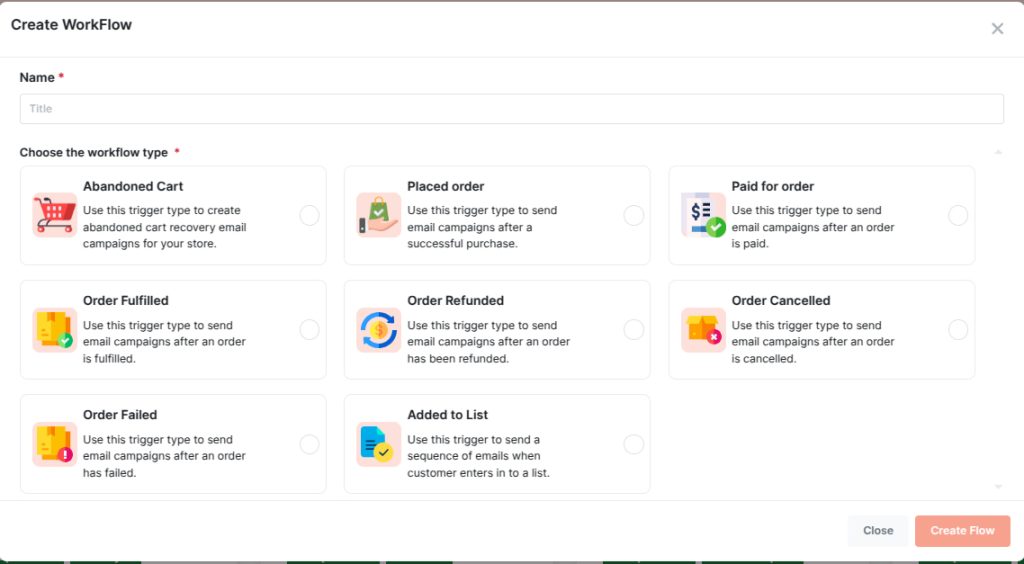
Select “Order Follow-up Emails,” and you will be asked to enter the name of the workflow. Enter the name and click “Create Flow”.
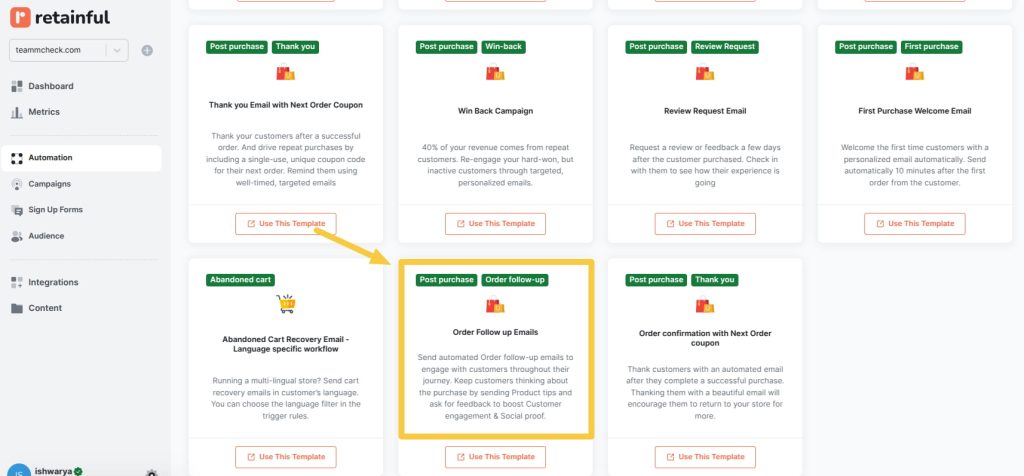
Also, you can create an order follow-up email automation for other triggers like: order cancellation, order refunds, order failure and more.
Step 3: Setup triggers and wait time
Set up triggers and customer rules to send automated WooCommerce transactional emails to a set of customers that meet criteria like order history, order value, order status, and more.
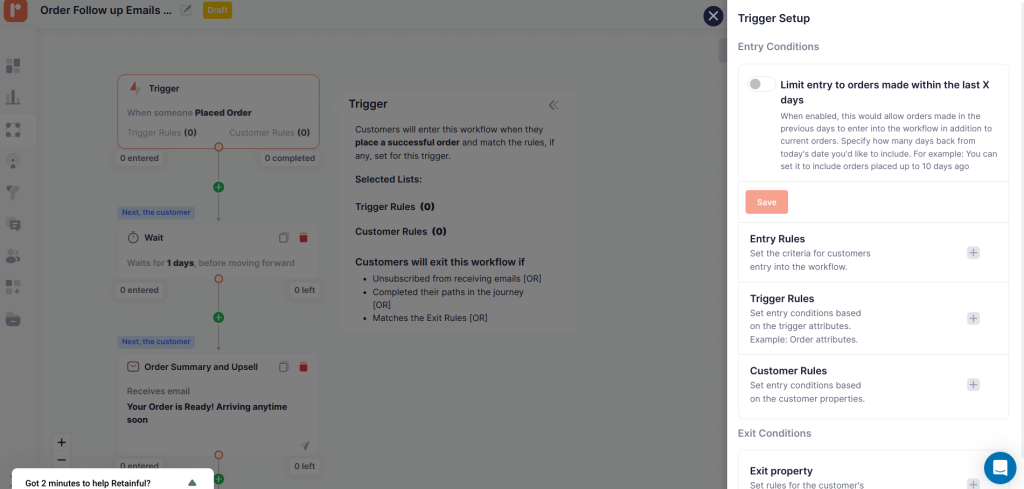
Also, Retainful allows you to send multiple automated WooCommerce order follow-up emails at well-timed intervals:
- First email: Order follow-up and upsell
- Second email: Product tips
- Third email: Product review request
To send product-specific custom WooCommerce order confirmation emails, set the product name in the Trigger rules like below:
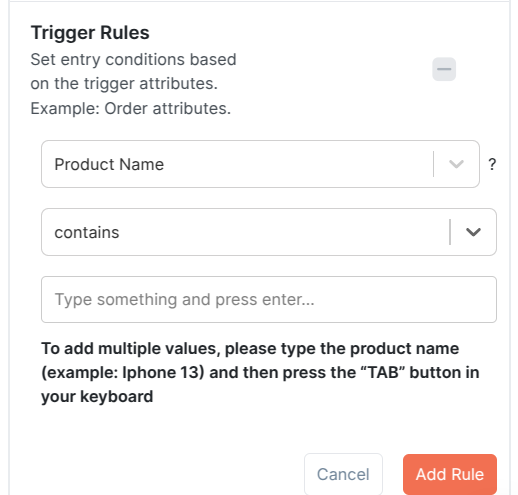
Step 4: Edit WooCommerce order email template content and design
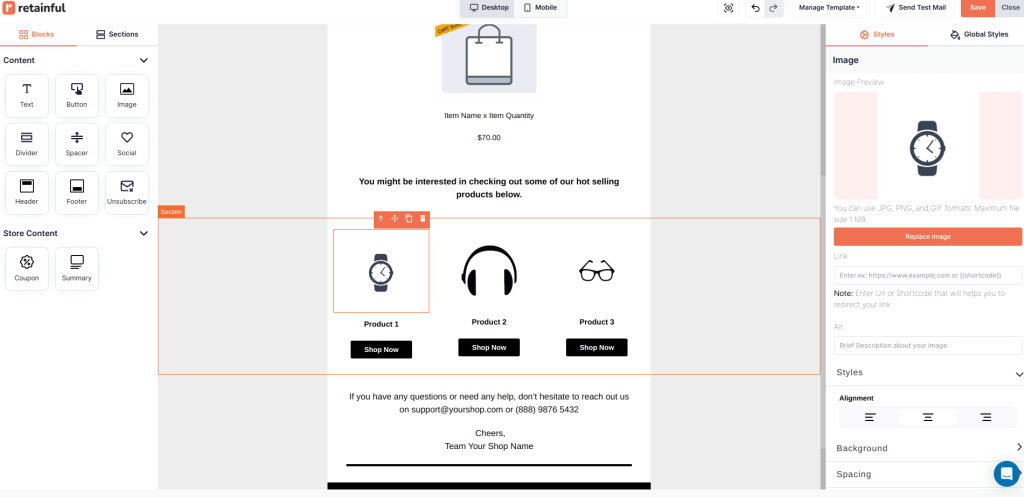
In Retainful, you can customize every element of the WooCommerce email order confirmation template, like logo, CTA, product images, and more.
Also, you can easily edit WooCommerce email content using an easy-to-use drag-and-drop email editor.
To customize the logo in the WooCommerce order email template:
Click the logo and upload your logo image in PNG or JPG format.
To customize the order summary in the WooCommerce order email template:
With Retainful you can include order details in the WooCommerce order template easily. The image of the ordered item, item quantity, and price in the order will be dynamically changed for every recipient.
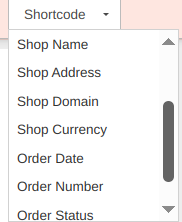
Editing WooCommerce order confirmation email template with shortcodes for personalization:
You can insert shortcodes in the WooCommerce order email template content like payment method, store name, customer name, order item number, and more.
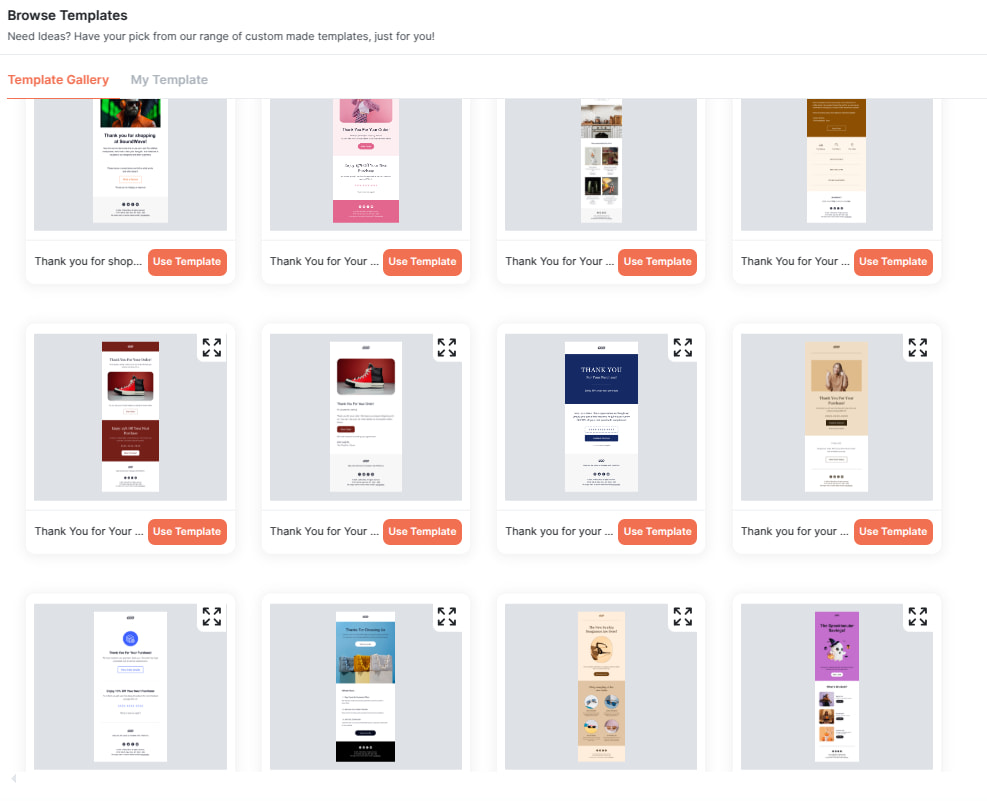
Changing the default WooCommerce order confirmation email template:
Also, Retainful has many ready-made order confirmation templates in its template library.
Step 5: Preview and send test email
You can preview the customized WooComerce email notification template and how it looks on mobile, tablet, and desktop.
Also, you can send a test email to find out whether all the elements of the custom WooCommerce order notification template fell in place.
Best Practices for Customizing WooCommerce Order Confirmation Email Template Design
1. Make Important Information Stand Out
Highlight key details such as the order number, shipping address, and payment status while customizing WooCommerce order email template. Use bold or larger fonts to make these details easy to spot at a glance.
2. Add a Clear Call to Action
Guide customers on what to do next. Whether it’s viewing their order status, tracking the shipment, or shopping more, include a clear, visually prominent CTA button.
3. Offer Additional Value with Cross-Sells
In the order confirmation email template, suggest complementary products using personalized recommendations based on what they bought. It’s a simple, non-intrusive way to encourage future purchases.
So, here is a WooCommerce order notification email example with cross-sells:
4. Customize the Subject Line
A generic subject line like “Order Confirmation” might not stand out. Customize it with personalization or a touch of enthusiasm. For example: “Your Order is Confirmed, [Name]! Here’s What You Bought.”
Related Reading: Learn how to design responsive order confirmation email templates and examples for inspiration in our blog:
– Responsive email: How to Design + Tips
– 15 Best Email Marketing Examples For 2025
Send WooCommerce Order Confirmation Emails For Free
In Retainful, you can automate WooCommerce order confirmation emails for Free. In Retainful’s free plan you get access to pre-built order follow-up automation workflow, ready-made templates, dynamic content and more.
Sending WooCommerce order confirmation emails reassures the customers about the purchase and, when done right, makes way for the next purchase, too.
So, customizing WooCommerce order confmation email template to make them on-brand with product images, order summaries, upselling, and personalizing requires more than just the default option of WooCommerce. So choose the best WooCommerce email marketing plugin.
Send multiple order follow-up emails automatically using Retainful’s email automation.
Also Read:
- 11 Best Ecommerce Email Templates + Examples
- How to send WooCommerce post-purchase emails?
- Welcome Email Series – Examples + How to Create
Yes. WooCommerce can send order confirmation emails. All you have to do is enable them by navigating through WooCommerce -> Settings -> Emails -> Placed order.
To customize WooCommerce order confirmation email,
1. Go to WooCommerce -> Settings -> Emails in your WordPress dashboard.
you can adjust basic settings like subject lines and colors or modify the HTML templates for deeper customization.
To send an email order status in WooCommerce, go to WooCommerce -> Settings -> Emails. Select the type of order status email you want to send and enable them.
If you want to send additional follow-up emails, you’ll need to use a plugin like WooCommerce Follow-Ups or integrate with an email marketing service that supports automation.
To customize your WooCommerce order email, go to WooCommerce -> Settings -> Emails and select the email type you want to modify. You can customize the email content, design, and layout through the built-in settings or by editing the HTML templates directly.
Step 1: Install Retainful and go to ‘Automation’
Step 2: Choose order follow-up automation workflow
Step 3: Setup the product name in the trigger rules
Step 4: Customize the email template
Step 5: Send test email and go live